Yearbook Master – Advanced Panel Pages
Frequently Needed Tasks
How do I get to the "advanced panel editor"
From your homepage in Yearbook Master:
– Click on “Manage Settings”
![]()
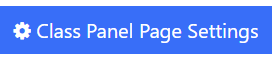
– Click on “Class Panel Page Settings”
– Woo! You are now in the “Advanced Panel Editor”
How can teachers make changes to their panel pages?
We have a simplified tool for them to make basic changes:
– Add people
– Remove people
– Modify a name
– Change photo or upload a photo of a new student
Please send this tutorial link to them which has a tutorial on how to make the changes.
Change the Font on an existing panel page
This tutorial covers how to change the font of a panel page.
– Ensure the font you want to use is added through “Font Settings”
– Select your panel you want to change the font for
– Find the “Photo Font” setting
![]()
– Choose the font you want to use, from the dropdown. (Any fonts you have added to your book, will be available here as well)
– Adjust your “Photo Font Size” to fit appropriately.
I am getting an error about the number of pages being incorrect. (too many kids or not enough per panel)
When your panel was initially created, it was created based on the number of students and pages you selected for that grade or teacher. If you try to remove too many students, or add too many, it may change the number of “pages” required.
In the advanced panel builder, you can control the size and spacing of the images to ensure they fit properly on the number of pages you selected.
Usually, you just need to adjust the size of the panel, in the advanced tool.

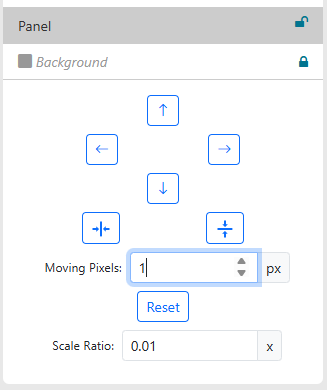
I want to shift the panel to a different position on the page itself. (the panel is covering elements)
You can move the panel itself to the: left, right, up or down
You cannot shrink or make the panel larger. This would distort the names and images.
To shift your panel, go to:
Layers > Select the “Panel” layer.
Move the Arrow Keys to shift the panel to your desired position.
Save your page.
Can I add more photos later? (such as Spring pictures)
Yes!
If you panel is “Not Approved Yet” it will be RED and say “Review & Approve”.
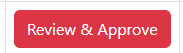
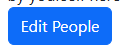
To make changes, click on “Needs Corrections”

and then click on “Edit People”
If your panel is “Approved” you will see the “Additional Corrections” button.
Click on that, and you will be able to add people and make edits.

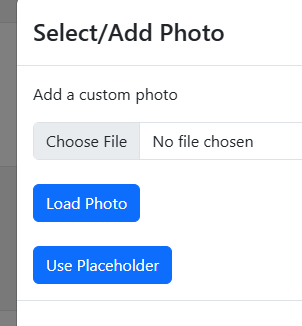
How can I add a placeholder for someone? I don't have their photo yet, or won't have it.
Teachers can add photos from their simplified panel review tool, or you can add them from the advanced panel builder.
You can add a placeholder image for someone, upload your own logo to use, or even add their photo later.
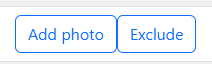
– Click on “Add Photo” when in the Edit People, or in the Advanced Panel Builder
– Click on “Use Placeholder”
– Click on the Placeholder Icon (a green check will appear when you click on it)
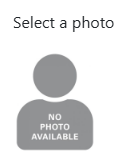
You can come back anytime and remove the placeholder, or add a custom photo you take and replace the placeholder image.
I want to move the names to UNDER or the SIDE of the photos.
You can easily change where the names are on the panels.
– Go to your advanced panel editor
– Select a panel page to edit
– Find the “
– Select “Side” or “Bottom”
– “Generate Your Preview”
– Save the panel page.
I need to add a missing student photo from Spring Photos or Retake Day
The panels are a snapshot in time. They won’t automatically update or add new photos, doing so would overwrite your current work/progress.
You can add any existing photos by using the “Add Student” tool.
Go to the Advanced Panel Builder Tool:
– Select the panel page you want to work on
– Click on “Add Student”
– Select “Participant with wrong teacher or grade”
– Search for the name
– Click on Add Student
This will add them to the panel. Look in the list, and if they are listed more than once, you can “Exclude” the photo you don’t want to use. Click on their photo to see the available photo options and choose a different one if you want.
Once all your changes are made, you’ll need to scroll down to the bottom, and generate the panel, review it, and then save it.
I need to add a missing staff photo
The panels are a snapshot in time. They won’t automatically update or add new photos, doing so would overwrite your current work/progress.
You can add any existing photos by using the “Add Student” tool. Most “Staff” pages are created as a “Student Class”. You can see your current staff listed in the section they were created.
Go to the Advanced Panel Builder Tool:
– Select the panel page you want to work on
– Click on “Add Student”
– Select “Participant with wrong teacher or grade”
– Search for the name
– If your page was a staff page, you will need to select “STAFF” from the list.
– Click on Add Student
This will add them to the panel. Look in the list, and if they are listed more than once, you can “Exclude” the photo you don’t want to use. Click on their photo to see the available photo options and choose a different one if you want.
Once all your changes are made, you’ll need to scroll down to the bottom, and generate the panel, review it, and then save it.
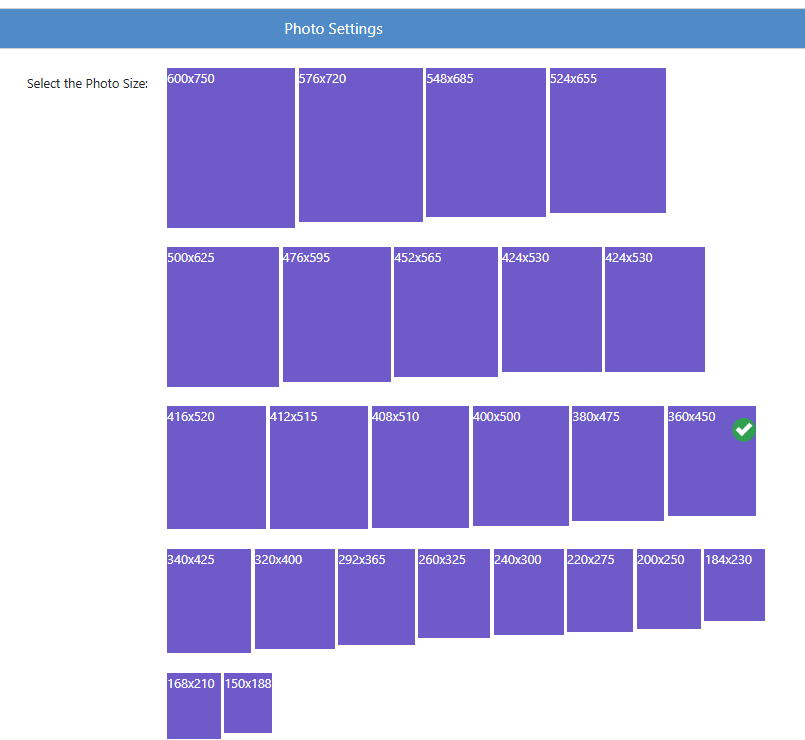
I need to make the photos larger or smaller
You can make the photos larger or smaller by selecting a different size at the bottom of the panel builder.
Go to the Advanced Panel Builder Tool:
– Select the panel page you want to work on
– Scroll to the bottom area where you see all the photo squares in purple
– Select a larger or smaller size
– Generate your panel
Once all your changes are made, you’ll need to scroll down to the bottom, and generate the panel, review it, and then save it.
I need space inbetween rows to add a quote or other text
You can change the row spacing to change the amount of space between each rows. Increase this to allow more space to add a senior quote, or other text.
You will add the other text on the “Work on a page”
Go to the Advanced Panel Builder Tool:
– Select the panel page you want to work on
– Scroll to the bottom area where you will see “Photo Row Spacing”
– Select a larger or smaller size
– Generate your panel
Once all your changes are made, you’ll need to scroll down to the bottom, and generate the panel, review it, and then save it.

I need to add another page for my panels (I have too many students)
If you have too many students to fit on your panels, you can easily add another page to your panels, so that the students will fit better, or have another page to flow onto.
Go to your ladder:
– Choose the page you want to add, and mark it as a panel
– Save your ladder
Go to the Advanced Panel Builder Tool:
– Select the panel page you want to work on
– In the “Additional Pages” select ALL the pages you want to use for this panel

– Adjust the size of your panels so they will fit onto the pages (you may have to make them smaller or larger)
– Generate your panel
Once all your changes are made, you’ll need to scroll down to the bottom, and generate the panel, review it, and then save it.
How can I add/remove or categorize photos into sections?
You can categorize into 2 or 3 sections by selecting:
“Special” from the Standard or Special panel dropdown. (this is directly below all the session numbers)

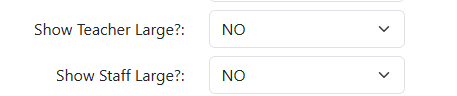
How do I make the Teacher or Aides/Other staff larger than the students?
At the bottom of the panel, you have two buttons you can toggle to make the teacher or other staff members larger than the students.
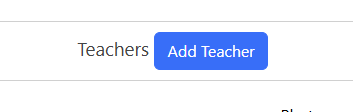
How can I add other staff such as aides to a panel?
You can use the “Add Teacher” button to add up to 2 staff members.
Use the “participant search” feature from the dropdown list.
I need my panels to be a certain number of photos across and down
You can control the size of the photos by selecting
However, the exact rows and columns will depend on how many persons, pages, and the size of the photos.
It’s a math problem that takes into account how many people in your panel, over the total number of pages for that panel, and then your desired size of the photo.
Sometimes depending on the math, you will need a certain number of pages.
If you need to make more than basic corrections or would like more control, you can use the advanced panel builder. This in depth tutorial covers all the functions of the builder.
Explanation of ALL Tools
This video goes over an explanation of each and every item that you can control.